Lesson 9: Turning (Abandoned Crosswind)

November 2nd, 2011 by PHC | Permalink

Attempt 2 to get this lesson in the bag was called off even sooner than the first.

On arrival to the aero club the sky was looking less than great but not entirely without hope, but the wind was really starting to pick up across the runway.

In the off chance it calmed my instructor sent me out to check the plane (Charlie Bravo…..again), but within 15 minutes she was walking over to tell me to stop as this was just not going to happen today, the wind was at its limits across the runway.

There’s always part of you that wants to get up there and keep progressing with the lessons, but in reality the lessons are better when done in good weather.

Thankfully there was another slot free just a day or so away so I booked that one up…….the weather is looking 50/50, but you never know.

Lesson 9: Turning (Abandoned after Take Off)

October 30th, 2011 by PHC | Permalink

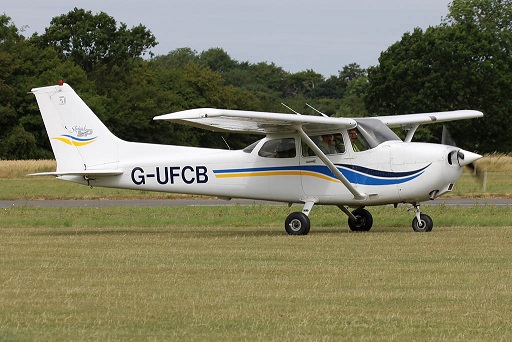
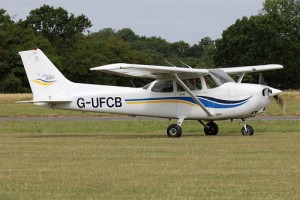
G-UFCB Cessna 172SP

G-UFCB : Cessna 172SP

This was to be my first flight back with my original instructor, back from a holiday, it would be nice to not have to go through the introductions – though having not flown with them over the last 4 lessons, it wasn’t going to be like jumping back in a plane with someone who fluently knows how you fly and what screw ups  you regularly make……… Still at least we were going, historically me and this instructor have spent more lessons drinking coffee, than flying.

And it nearly got cancelled right from the off.

With cloud levels at around 1800ft, one set of my notes suggested I hadn’t done Climbing and Descending Part 2 – there was no hope of that with less than 2000ft to the cloud base.    Grrr to my previous instructor not writing stuff up properly and rushing into his next lesson 😉    Still we sorted it and the lesson was on.

Briefing:   “A” is for Attitude Indicator (Artificial Horizon)

Flying G-UFCB (Charlie Bravo), again……   I quite like it now, but it’s spluttery engine drives me absolutely mad.   It won’t start, it starts and then you take the power out below 1000RPM and it plunges into a spluttering stall.

Keeping his post short, we would be attempting to do 30 degree turns.

When asked what instruments we’d be using I got to Attitude Indicator and blanked:   This is becoming a joke, it’s the second time I’ve forgotten the name of this instrument in a briefing.

Turning is all about the Three B’s:

Bank
Balance
Back Pressure.

Checkout & Taxi

Charlie Bravo was on the side of a taxi way rather than in parking, but other than that nothing exciting to write home about.

Radio call for taxi clearance was clear but ATC decided to give me not just a holding point to taxi to, but also the runway number………which I then forgot to read back.    Damn it!

For power checks into the wind I decided I was most important and planted the plane square in the middle of the holding point area (into wind of course), kind of blocking anyone else who may want to come past.

Take Off

I’d do the take off, so with a departure call and clearance for take off exchange with ATC (remembering to read back the runway this time).    Lined up on the white line, full power on…… My instructor might say otherwise but I was very happy with how straight we stayed as we ran down the runway.

65 Knots applying a little back pressure to get it up and then into the climb at 80 knots.

The wind was strong and worrying more about flying an accurate airspeed, I was watching my instruments more than the outside world (cue ‘telling off’ number one). I looked up on cue, I had a quick look around and then promptly repeated my mistake and went back to flying instruments this time watching the artificial horizon and the airspeed – we climbed at a perfect indicated airspeed of 80 knots, but the wind was putting us all over the place and the lag on the instruments was probably making me look like I was chasing the impossible.

I think this is like learning to drive all over again:

When you first learn, you change gear based on a visual cue of the RPM gauge and you constantly look back at the speed indicator……….some lessons later, you change gear on the sound of the engine (thus keeping your head up) and you know your speed almost from visual reference & throttle position of your foot.

The same thing I think is going to apply to flying, simulators don’t give you a good feel for engine noise – so you lean on the instruments.  It’s going to take time to get use to what 2200 RPM sounds like and what the attitude looks like for an 80 knot climb.

“Climb to 1,500ft please.”

So up we climb…….and true to historical form, overshoot (cue ‘telling off’ number two).   I anticipate leveling out a hundred feet early – but on my first climb of the day I’m not being absolute on the flight controls to stop the ascent dead, I’m slow on adjusting the power and take an age before I get to trimming it up.  Result, it’s taking the equivalent of 250ft (~30 seconds) of unwanted climb before the plane is settled level, hey presto we’ve net overshot the desired altitude.

Arrrh!!    I’ve made a mental note now:   Start Leveling out 300ft early!!!

To hell with what the book says, I’d rather begin to level out sooner and hit my mark than keep overshooting on climbs, I don’t do it on descents so it’s the effect of having power and not forcing the nose to level for that amount of power, that’s causing the headache.

Aborting the Lesson

With the clouds sat at under 1700ft now, this lesson was going nowhere, another 500ft free from cloud or a better horizon and this would be on, but with the horizon being almost non-existent today it was game over.

We turned back to the airport and made a right base entry (rather than flying the standard left-turn circuit).

Turning would have to wait for another day…….. 2o minutes flying in the log book though (it all counts!).

Me and this instructor simply cannot get a break with the weather 🙁

Lesson 8: Climbing & Descending (Part 2)

October 23rd, 2011 by PHC | Permalink

G-UFCB Cessna 172SP

G-UFCB : Cessna 172SP

Another early morning flight and as is becoming tradition now, I was met by yet another instructor I’ve never flown with before (6 down, 2 to go).

Briefing

We’d be looking back at ‘Best Rate of Climb’,  ‘Best Angle of Climb’ and doing some work with full (30 degrees) flaps.

In the past my brain has had a tendency to blank at key moments of briefing quiz questions – today it was on better form and I got my Best Rate of Climb Speed = Vy and conversely that Best Angle of Climb Speed = Vx spot on.    You read it, you think it’s sunk in, 2 weeks later someone asks you and it’s 50/50 whether it leaps to the top of your mind.

Another set of numbers to remember:

Vy = 74 Knots
Vx = 65 Knots

For convenience though most climbs/descents are flown at 80 Knots, you only really need to worry about using Best Angle of Climb if you’re doing a short field / obstacles at the end of the runway take off (e.g. Need to get maximum altitude the shortest distance).

We’d be looking at full flaps and how poorly the Cessna 172SP climbs if it has full flaps lowered.

Finally we’d be looking at getting into final approach configuration of full flaps and 65 knots indicated airspeed.

The weather was looking good for at least the next hour, no royal flights would be anywhere near and my instructor would be handling the paperwork of the flight…….  In the mean time, I’d check the plane (G-UFCB).

Plane Check-Out

The lesson would be going no further if there was anything ‘exciting’ to report, so thankfully this was an uneventful checkout.

I keep getting lumped with Charlie Bravo……today I’m informed there’s absolutely no hope of being trusted with a go at landing it because it’s nose wheel is in poor shape and the instructors are trying to keep as much weight off it as they can, for as long as they can during landings (Just what you want to hear before taking off in a  plane!)

It’s got a touch over 10 gallons of fuel in each tank and other than the issue with the nose wheel, it looks as good as I’ve ever seen Charlie Bravo.

It won’t start….

Well this was a first, aux. fuel pump was used to get some fuel into it the oil temp was outside of the green (being the first flight of the day, that’s not exactly surprising).   All going well, until I set the throttle and turned the key with my other hand on the mixture….splutter, splutter, nothing.

My instructor said “that doesn’t sound good.” – meanwhile I was having flash backs to the Extra 200 that wouldn’t start – but he told me to try that again.  I did and got nothing more then spluttering.

Third time lucky…….ahhh Charlie Bravo, why do you treat me so?

Taxi & Radio Ga Ga

It was bound to happen….all of my radio calls to date have been good.   On this lesson my taxi clearance request was a near stumble through of a call.   I made the mistake of not prepping in my mind, the sentence I was going to say and then when I went to just say it.  It was rough – clear enough for ATC,  but could have been so much smoother.

I blame it on having a new instructor.

We taxied out to the holding point nice enough – it’s the small details like half looking like you know what you’re doing on the taxi to the holding point that are the nicest of wins.   Only a few months ago back in August the whole thing was massively daunting and my taxi was nothing like as nice as this.

Take Off

My instructor had been absolute right from the briefing that he’d be doing this take off due to the nose wheel.   Other instructors talk through the take off, this one did the same but it was almost a well rehearsed script rather than talking through the actions.

However, what I did like was being talked through the altitudes with respect to what our failure options were.  So for example, at 500ft there’s no hope of turning around, if the engine fails we must land somewhere ahead of ourselves (This is because in the turn we’d lose 500ft), at this altitude then our failure landing point was likely to be a nearby rugby field (and pray for not scoring a conversion I guess!).   At 750ft, there are some school playing fields that we could probably reach and finally at a 1000ft we have plenty of options, including the preferable one of turning around and making a run for the airfield we’ve just taken off from.

My instructor does the climb to around 2,000ft.   As we’ve never flown together before (and rather frustratingly because he didn’t do part 1 of this lesson with me), he quite rightly wants to see what my climbs are like.

Climbing to 3000ft.

“Ok, you have control…..Climb to 3,000ft for me.”

Full power goes on, I set up the attitude to give me 80knots indicated airspeed and we start soaring up at around 500ft/min.

Approaching 2,900ft I begin to level out of the climb, but I guess being the first touch of the controls I’d had all flight, I level out slowly I trim the plane up slowly and I do a fairly poor job of “holding” the plane level as we hit 3,000ft – by the time it’s all trimmed up and I look back at the altitude, I’ve overshot by 150ft (and just to add insult to injury I’m 20 degrees off my original heading).   Damn it!   These are the moments where you just get tired of the psychological effects of being with someone you’ve not flown with before.    My instructor goes into a recital I’ve heard before about accuracy and that we’d try that again (in short that overshoot has just wasted 5 minutes of this lesson [2 minutes to get back down to 2000ft, 2 minutes to get back up and some lookouts and chat in between]).

The trick now, as with anything is to not spend the rest of the lesson beating myself up about the screw-ups to this point and to just crack on and fly the plane.

The descent back to 2,000ft is spot on – a few seconds to look around, set the heading bug and it’s back on full power and climbing up again to 3000ft.

This time everything is a bit faster, a bit more absolute in ensuring the plane stays level as I begin to level out of the climb.   We’ve not drifted more than 1 degree off course and by the time it’s all trimmed up it’s 3000ft, +/-40ft.  My instructor calls out “Now that’s much better.”

I got the impression that he was now happy I could climb/descend and that the first climb was just nerves…….On to why we were up here.

Best Rate of Climb

A climb at 80 knots feels like you’re climbing comfortably fast and getting to where you want to be, the nose is pointing up at about 10 degrees and it’s a fairly civilised angle.

For best rate of climb you want 74 knots, but you achieve this by changing the angle of the nose – power stays at full.   As a result to get the speed down, the nose much go higher.

A climb at a Cessna 172SP’s best rate of climb feels like you’re aiming to get to the heavens.   The nose is so high that you don’t have a hope of seeing over it.

Now compared to the climbs I’ve done in the Extra, this is all still very civilised……the Extra will go vertical quite happily for a long old time!

This is probably the first time you get a serious sense of speed in a Cessna – largely driven by the fact you don’t have a lot of time to be thinking about leveling out of the maneuver.

Descending with Full Flaps

By contrast when we descend with full flaps, it’s a descent at 65knots and you have the sensation of nothing but time……the reality is you’re descending quite steeply!

To do this maneuver, we bring the plane back into the white arc and under the VFE speed (Max. Flap Operation speed), lower the flaps to 20 degrees anticipating the nose lifting and then lowering the nose to maintain the airspeed – finally add on the remaining 10 degrees.    One last hold of the attitude for 65 knots before trimming it up one last time.

We’re now descending at a leisurely 65knots – though the rate of descent is fairly vast at around 700-800fpm.

We spend some time looking at how different power settings affect the rate of descent:

–  For every 100rpm reduction in power, the rate of descent is increased by 100ft/min

So if we want to descend slower, we can just add power……if we need to descend faster, we can reduce power.   All while keeping the attitude the same.

This brings us on to a vital fact for the approach to landing:

– Attitude controls Airspeed
– Power controls Rate of Descent.

We did this a couple of times, the last of which was setting the plane up for the approach to land.

Landing

We were chased in by a something of 737 size so landing and getting off the runway was done at pace by my instructor.

Taxing back to parking there is a turn on to the main taxi straight which I now live for getting right……I overshoot the yellow line every time, the smallest of wins like this are actually the ones you remember most.

You don’t get to practice these little things as such, so you get one go per lesson and the moment you find you’re doing it repeatedly is the moment you can tick the box and feel like you’ve made a fluent step forward.

Lesson 7: Climbing & Descending (Part 1)

September 29th, 2011 by PHC | Permalink

G-UFCB Cessna 172SP

G-UFCB : Cessna 172SP

Fly when the sun shines!    It has been a particularly hot September, record breaking in fact, so this lesson was squeezed in as a spure of the moment “it’s going to be hot all week” reaction.

Consequently, I’d be flying with yet another instructor!   I can remember looking forward to saying “I’ve flown in all the clubs planes….”.   The concept of flying with all of their instructors, was not on my list of things to do – but seven lessons in, I’m nearly there (Flown with 5  –  3 to go).

This time I’d be flying with an ex-military & civil Test Pilot.  So I was hopeful I’d come away from this lesson, feeling like I’d been pushed to my limits and the carrot of new and tempting things, had been waved before me.

Briefing

We went through why I wanted to fly,  my background (normally ticks the general box to cover “Knows planes”) and then cracked on with the detail of how to climb and descend – properly.

Power, Attitude,  Trim :  Covers all but the leveling off case:

Climbing:   Power (Full), Attitude (Maintaining 80 knots), Trim

Descending: Power (1500 RPM), Attitude (Maintain 90 knots), Trim

Leveling off: Attitude (Straight & Level), Power (2300 RPM), Trim.

On top of the Cruise Climb/Descents, we’d also be looking at a Glide Descent (Power to Idle) and Part 2 would focus on the same topic but with flaps.

Plane Checkout

Flying Golf Uniform Foxtrot Charlie Bravo (G-UFCB), today – the oldest of the clubs planes and the one that dislikes me the most…..it will not turn right with rudder properly, it won’t idle at 600RPM (splutters like it’s going to die) so you have to remember to ‘idle’ it at 1000 RPM.

All that said though, it does fly just fine.

Being a morning lesson I guess it’d just been tanked up because the fuel gauge said it was full and manually checked the tank it was indeed brimming with fuel!    We were in no risk of running out, that’s for sure.

Taxi and Power Checks

Yay, the first lesson where I’ve not been pulled up on riding the brakes!  I put a lot of mental effort into this lesson to only use them when really needed in turning (and brake tests!).

Unfortunately my power settings on the ground still aren’t cemented in my head.    There isn’t that many settings to remember:

  1. 1000 RPM, first check of the magnetos
  2. 1200 RPM, whenever stopped.
  3. 600 RPM (Idle), before releasing the brakes.
  4. 1800 RPM, Power test into Wind and second check of Magnetos.

But some how I keep having to look back at where I am in the checklist, this is one of those small things to look forward to becoming instinctive.

Radio Read Back!

My radio calls were going so well, until today when I promptly read back every detail of our clearance to take off, except the:  Clear for takeoff part!    Still my instructor said I sounded confident with the radios, so I’ll take the positive out of this.

Some of the Items that must be read back to Air Traffic Service Unit:

  • Runway in use
  • Clearance for anything involving the runway (land/take-off, hold short of, enter etc.)
  • Altimeter Settings
  • Airways / Route Clearance
  • Taxi instructions
  • Any instruction with a requested read back

Take Off

There are two types of instructors in this world:   One will take you through a perceived least risk path and those that conclude “You can’t go far wrong with me in the plane, so you go for it and if you screw it up – I’ll take over and sort it.”

If you’re spending this much cash, my advice is you want the latter…… In the UK the bill is roughly £3/min.   As the chief flight instructor of the club once said to me:  “You should enjoy it…….It’s a very expensive way of not enjoying yourself.”

To that end I was told I’d be doing the take off,  my instructor would keep his hands on the controls and make sure nothing could get screwed up.

Putting full power on (this time in a more controlled motion of the throttle then just ‘wam! full power’), Charlie Bravo actually stays pretty straight – Oh I’m sure to experts watching from afar, it wasn’t the most pretty take off run, but I’ve had experts slam me and the plane into the runway before – so for my money, this was good for a  second go.

65 Knots start pulling gently back and we’re airborne!

……and then we’re yawing left, waaaay more then I was expecting, in the excitement my brain takes far to long to connect the dots of pressing the right rudder, but it gets there and it’s soon sorted out.

Climbing and Descending

The sky is a sea of blue, there’s almost no wind, and there’s a huge horizon – this really is perfect flying conditions.

We climb to 3000ft before my instructor reminds of some of the points in the briefing and then we crack on to climbing to 4000ft, full power, keeping the airspeed at 80 knots.   I trim the plane for the climb, but keep my hands on the controls almost for the sub-concious comfort of “I’m still flying it.”

At 3900ft I begin to level off, until the plane is sorted we’ll still be climbing so it’s important to pre-empt the final altitude to provide some ‘error time’ in which you can setup the plane for what you want it to be doing next, without it overshooting and then needing descend and mess about.

We fly 4000ft feet for a while, my hands still on the controls which is obviously noticed by my instructor who asks “What happens if you take your hands off the controls?”    So I do…….Nothing, we continue to fly 4000ft straight and level, he seems pleased.

The view is just stunning, the one catch to learning to fly is that you’re learning to fly – you can’t really stop and take pictures (or spend that much time looking down).

No time for sightseeing, I set power to 1500RPM and control the decent to 3000ft @ 90knots, sometimes dropping to 85, but it’s close enough.

This task of climbing and descending is repeated a few times, no issues here, the numbers are in my head and I could do this all day.

Refining my Turns

My turning is ok, but this instructor suggests my use of rudder is lagging the turn action and it could be smoother if I could get use to putting the rudder on as I turn and predicting how much is needed – rather than as you realise the balance ball is showing the plane out of balance and then applying rudder (which makes the plane jolt).

The problem with prediction is you need experience to be able to do it well – no problem, he asks me to just start doing some fairly rapid banks left/right to 20 degrees of turn, ‘get a feel for how much rudder you need as you turn harder’.

It’s not why we’re up here, but it’s going to be useful practice for when we start the official turn lessons.   Definitely got something out of this sub-lesson.     I’ve said it before, the best lessons come from when your instructor works to what they can see you can/can’t do:  Helps you refine the stuff that needs work and tempts you with glimpses of things you want to already be doing!

Glide Descent (A polite way of saying “falling out of the sky!”)
If the engine fails at altitude, your best option is a glide descent, aiming for the best endurance your plane can achieve – which comes at a certain airspeed for the plane you’re in.

Essentially a glide descent, is to take the engine to idle (~600RPM) and then trip up for an airspeed of 90 knots.

We did this and were descending at 500ft per minute.

The physics is obvious, you’re falling out of the sky at 500ft per minute, you are going to hit the ground if you don’t do something.   The reality at least for a while though, is quite surreal:

At 4000ft, falling (gliding!) at 500ft per minute, it will take you 8 minutes to hit the ground……you can glide for 4 minutes and still be only at 2000ft, which would be a perfectly acceptable flying altitude, so you have some time to think and get yourself sorted – especially if you were to be gliding for your life.

If you get in planes and worry about what will happen if the engine fails, you should try this exercise with an instructor.    At 4000ft with the engine at idle, you’ll feel almost as if you have all the time in the world.

Once down to 3000ft, we did another cruise climb and descent and then it was time to head back home.

Local Knowledge

For the very first time I actually felt like in my head I knew my orientation (just about!).   In early lessons I felt lost from about 500ft up in the air, even though I should have known where in the city I was and which way we were pointing when we took off – the fact is so much is going on that orientating yourself goes out of the window very quickly in the early lessons.

Main roads really look so much less like main roads from 2000ft up, but this time I just about knew where I was and we could follow the A14 to home.

Landing

For a glorious sunshine day, this lesson landed in some fairly hard cross-winds, there was going to be no hope of getting to even come close to doing this one.

But I came away happy with the lesson, it was very cool and I’d fly with the instructor again any day.
Lesson 6: Straight and Level Flight (Part 2)

September 25th, 2011 by PHC | Permalink

Change of instructor again, I’m not convinced this constant changing of instructors is good for my flying.

This lesson was focused on flying straight and level but at different airspeeds, changing airspeed rapidly and also an element of practice and refinement from what was done in part 1.

We’d be flying G-HERC today.

The weather forecast had been for a glorious blue sky day, unfortunately when are they ever right?  It had been blue sky at 10am, but now at 2pm it was massively overcast.

Plane Checkout

Other than the landing light not working, which I was reminded was not a legal requirement so didn’t matter (If I was being cynical if you’re not going to do anything about it, you could argue why is it on the checklist at all…..), the plane, being G-HERC, was in good order.   As the clubs’ planes go, this is one of the best.

Pre-Flight Checks

Suffering again from New Instructor Syndrome, I picked a whole new set of stupid things to screw up – including a bizarre moment of having started the plane not letting go of the ignition key…….No I don’t know why either!

Getting quite tired of still not having the pre-flight stuff down to a formality. part of me wants to blame the format of the checklist, because it’s easy to lose your place.   The other part of me feels like I need to spend 2 hours doing nothing but starting the plane up, pre-takeoff checking it, shutdown and repeat……repetition, repetition, repetition.

Unlike other instructors though, this time when I missed a step, I was 5 steps further along before the instructor spotted the miss.   Either he expected me to have this sorted by now, or he had other things on his mind.

I did the radio call for taxi clearance.

Now I’m sure the tower abbreviated our call sign on their response (G-RC), and once they do, you can begin using the abbreviated version (but they must do it first).   So I called back using an abbreviated call sign, which my instructor flagged me on for doing.   I put up a small amount of defence that I thought they had abbreviated, he assured me they “never do on the first call.” That must be a house rule, because the book doesn’t say they can’t…… We’ll see, I have more lessons to check  🙂      Either way I gave him the benefit of the doubt.

Flying at 2,500ft

Trimmed up at 2500ft:  100knots, 2300RPM.

We did some work dropping the power to 1900 RPM and flying at 80knots, trimming to hold straight and level and then back to 100 knots.

Normally I’m fine, but on this lesson I was typically overshooting my designated altitude by 150-200ft, not great.    There was so much wind that getting it in trim was just a constant battle, needs a bit of work though.

The lesson was made a bit more frustrating by the fact that normally I’m allowed to do all the turns, my turning is fairly good and all instructors before have been happy to just give me a new heading and let me fly on to it.   Today, on the grounds of allowing me to focus just on the task at hand, my instructor was doing the turns……. For my money this approach had no positive impact on the quality of my flying.    It felt like doing the course by the numbers, instead of assessing where I was at and adjusting the lesson accordingly.

We moved on to a different type of changing airspeed, much more similar to how in a car if you wanted to get to a new speed as quick as possible, you might floor the accelerator and then back off as you approach the target speed.   Same in a plane, to go from 80knots to 100knots, you can just open the throttle fully and then back it off as you approach 100knots.

The difference in a plane is that if you just put full power on, first the increase in torque and slipstream from the propeller will yaw the plane (so you need to be prepared with rudder) and an increase in power will give you an increase in lift, so you need to push forward on the controls to keep the nose level before trimming the plane a little (as airspeed will be constantly changing during the acceleration, you won’t be able to easily “set” the trim for the new airspeed until you get there).

Rapidly reducing airspeed brings with it a higher work load, as you close the throttle the nose will drop rapidly and the speed will be killed pretty quickly.   Now there’s more to do in less time, holding the nose level and starting to trim nose up quickly before bringing the engine power back on to 1900RPM……from a 100knots to 80 knots, there’s about 3.5 seconds to get everything sorted.

Slow Flight with Flaps

As the last part of the lesson, we brought the airspeed down to inside the white arc (Below VFE) – the speed at which the flaps can be operated.   And then put the flaps down to 20 degrees.

Looked after the nose of the plane as the flaps moved and then trimmed it up to fly straight and level at 70knots, always looking around for other planes, checking the power and instruments.

We repeated this a couple of times to get a good feel for it.

Bounced Landing

Instructor did the landing, but was to fast and pulled further back into the flare of the landing to kill the speed – but didn’t have the altitude.    The result was we hit the main landing gears hard and bounced, he recovered it just fine though.

At some point it will be me making that mistake…..

End of Lesson

All in all the lesson was enjoyable, but the weather was overcast and I didn’t feel I clicked with this instructor the way I have with others.   However, flying with lots of different instructors should get me more comfortable jumping in a plane with someone I’ve only just met – when that distant final check flight comes, that’s probably how it will be, so I need to be fine doing it.

I was told I could move on to Climbing & Descending.

The Extra ‘Lesson’ : Aerobatics

September 24th, 2011 by PHC | Permalink

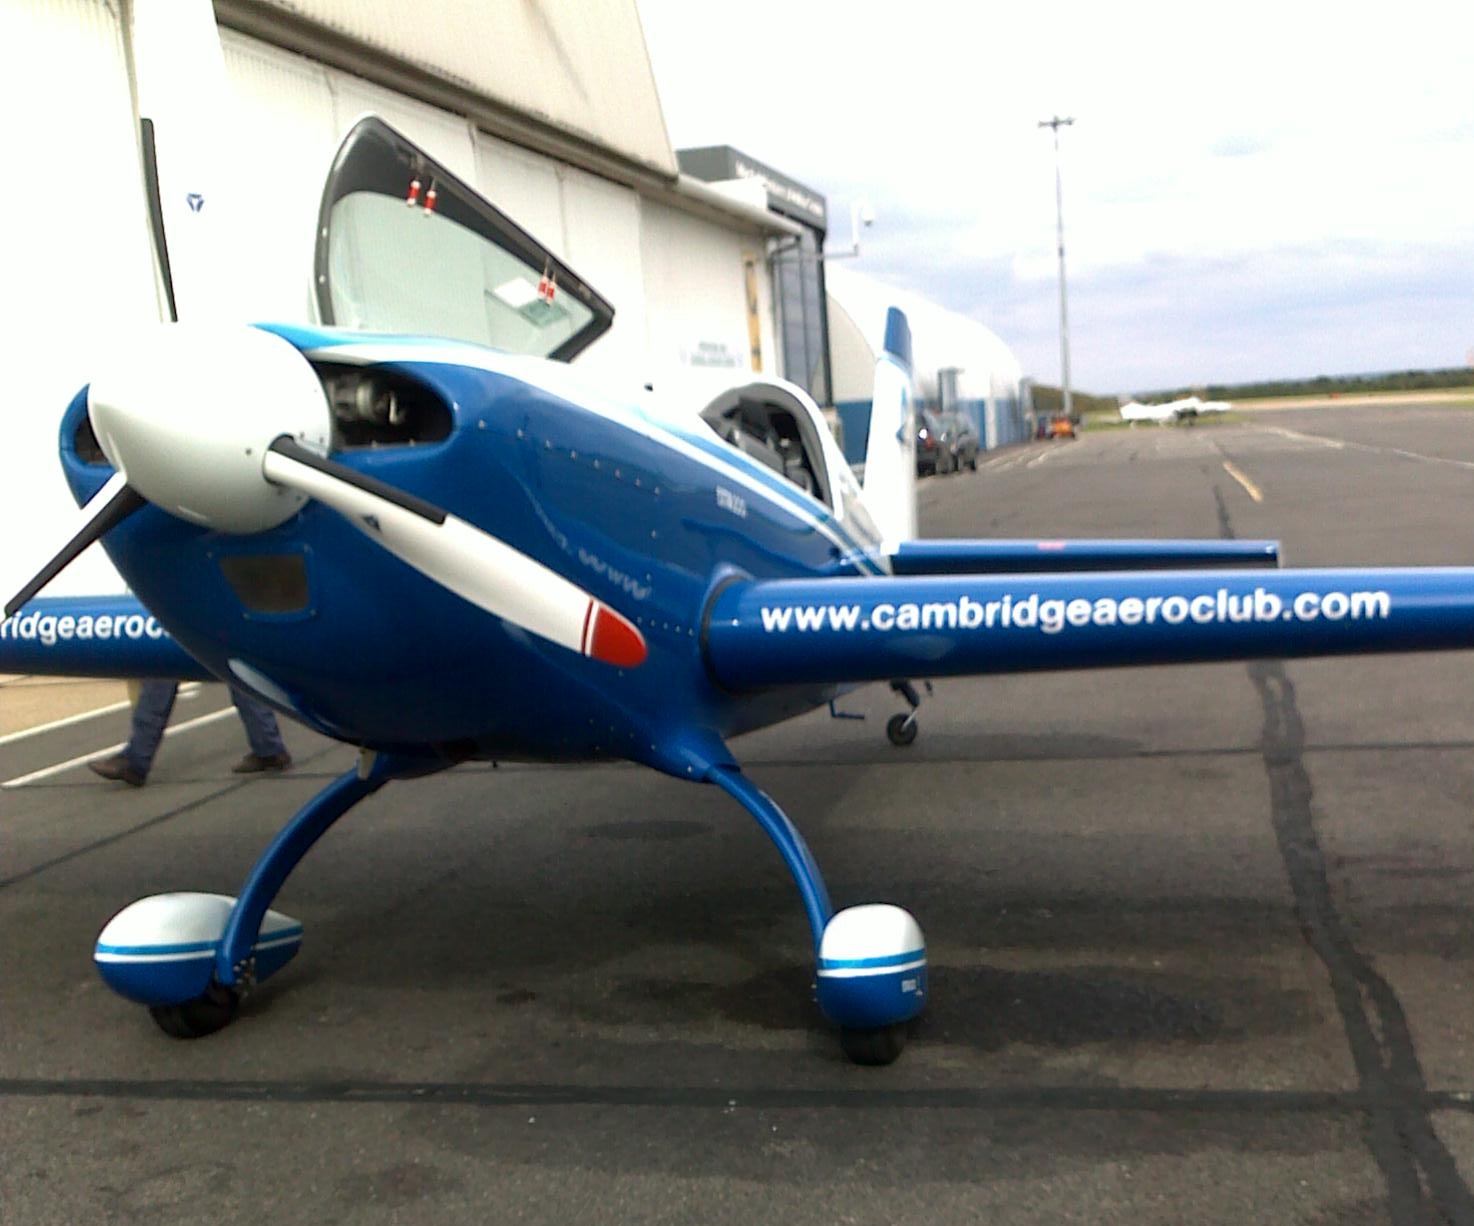
The Extra 200 that did not want to start its engine!A month ago this plane refused to start for me.  The second time I tried to go flying in it, the gods of clouds had other ideas.

Third time lucky, it was perfect blue skies – All the Extra EA-200 had to do was start!

I would be flying with the clubs’ Chief Flying Instructor, so a screw up in the plane would probably find its way back into my Cessna file, but in reality this flight was more about flying something a bit different, a lot more responsive and just getting up there and doing some absolutely mental maneuvers that you wouldn’t dare do in many other planes.

The knowledge that I was doing my PPL with the club seemed to help, a quick read through my file showed I’d at least know what the controls all did when I got up there, so we could skip the real basics.    He asked what I’d like to do…..  “Anything but straight and level flight.”

Take Off

I was expecting good things from this plane, what I wasn’t expecting was to “back track” (taxi the wrong way up the runway, right to its edge), turn around and then go screeeaaaming down the runway at full pelt.

Forget steady climb, we were near vertical and at 1000ft before you could say “Wow”.

The take off and rate of climb this plane has puts other planes in their place.

We made a sharp turn to the north east and headed to an area of fields.

Controls, Rolls and Loops

Once we hit 3000ft, I was given the controls to just have a feel of the plane and see how much more responsive it was then the Cessna.   I was told I’d probably only need to fly it with 3 fingers.

With a few shallow but fast turns I’d convinced myself my instructor was very far from wrong…….  This plane flies soooo elegantly, just point it where you want to go and it goes (immediately!).

The Extra 200, even though it is the smaller brother of the EA-300, just responds to any control input instantly and gains or drops altitude like a rocket ship!

My instructor took the controls and performed an aileron roll, then promptly let me repeat the exercise.

Next we tried some loops, getting to about +2 – 2.5 G as we came out of them.

I was then basically let loose with the plane for a few minutes to try pretty much anything I wanted to do.    Even though I suspect there’s nothing much you can do to badly wrong in that plane from 3000ft, I did keep asking “Are you ok if I roll…….are you ok if I loop?”   Firstly I didn’t want to do a maneuver without sufficient airspeed.

For something a bit different, I banked the plane on to a 90 degree turn, pulled back on the stick and put the Extra into as tight a turn as you’re ever going to get (much tighter than anything a Cessna can do!!).    After which the instructor asked if I did any simulator work, because most people don’t do that sort of thing on a trial lesson – I’m not sure if he meant it as a complement (Good to do something a bit more fun then straight and gentle turns etc.) or as a dig (you’ve picked up some bad habits during 90 degree turns).   We only lost 500ft, it was fun and there’s not many planes you can jump in and be allowed to do that sort of thing in, so I’m sticking to it being a compliment 🙂

Straight and Level Flight:   Inverted

A quick talk through of how to do it and then it was over to me to put it into a roll and then that just as we approached being inverted, pushing hard forward on the stick and leveling off.

We’re now flying straight and level, but upside down.

I’m no longer attached to my chair and only the safety harnesses are essentially keeping me in the plane at all!!

We flew like that for maybe a mile.

For me this was the best thing we did in the lesson, it was amazing to just be hanging upside down and see the plane just flying absolutely straight and level while inverted.   Being able to look down and see cars on the main roads driving along, thinking “if only they looked up, how strange must we appear from down there!”.

Insane Rolls and Tail Slipping

To end the lesson my instructor took over and gave me a demo of how insanely fast the Extra will roll if you wanted it to – betting I couldn’t keep count.

He wasn’t wrong, after about 9 rotations in as many seconds, I’d given up counting and was just enjoying it too much.

For the finale he put the plane vertical, climbing straight up, before taking the power back to idle and then letting the plane literally “slip” out of the sky backwards!   Looking out the window, you’re essentially falling back through the sky while pointing vertically up.   Before spinning the plane back round to point straight for the ground, putting power back on and pulling out of the maneuver.

We’d managed to get the G-force meter up to a touch under 5G.

Touch and Goes

Heading home, to burn the last of the fuel we did a few touch and goes.   A landing followed by full power and then back into the air.      The first of which had to be aborted due to a Cessna not leaving the runway quick enough – I was flying with the clubs chief flight instructor, so although I was thinking “we’re leaving this abort a bit late”, I’m sure he knew exactly what he was doing and to be honest in an Extra it’s so manoeuvrable and has so much power in reserve you have lots of time to make decisions.

After we’d landed, my instructor went back to work and did his day job – I on the other hand was in a world of excitement and the beginning of a major headache, caused more by the constant vibration of the plane, then the spins, rolls and mad maneuvers I think.    Nothing a coffee couldn’t fix……

I’d recommend going up in an Extra to anyone, if not for the fun you’ll have doing maneuvers, for a familiarisation of how insanely responsive they are.

Lesson 5: Straight and Level Flight (Part 1)

September 19th, 2011 by PHC | Permalink

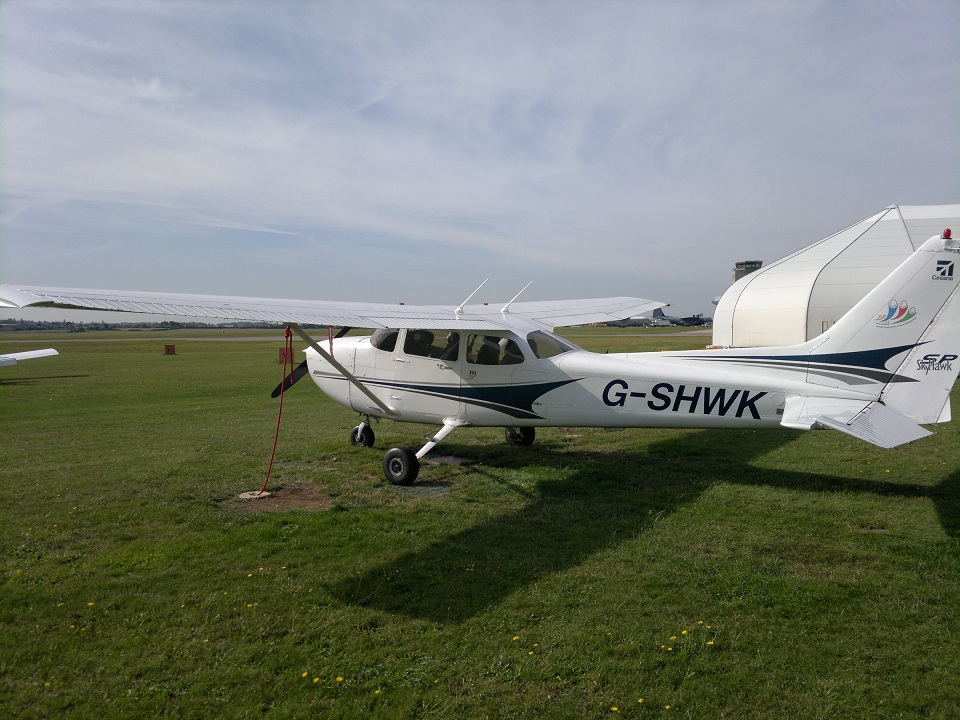
G-SHWK after todays flight

G-SHWK

It’s the staple of flying, straight and level – no change in altitude or direction.

The first catch of the day was getting to the aero club and being met by a different flight instructor!   A part of me wanted to get through this course with the same instructor, previously I’d moved lessons to align with the same instructor (normally with a result of rain and instead of flying, we’d be drinking coffee).

Having been through the briefing for this lesson previously (and then cancelled due to cross-wind).  I was really hoping to check the plane and just get going.   With a new instructor that was not going to happen, we’d have to go through it all again.

To my surprise that was no bad thing, he introduced himself as flying Airbus for a commercial airline as his day job and taught students part time.  The briefing took a different style and brought with it a certain absoluteness on the ‘real essentials’:   Put very bluntly:

The thing that will kill you in a plane like this, is hitting something or being hit by something….  Lookout is essential.

Briefing goes smooth, though I’m still having odd random moments of brain freeze where I know the answer, but the right words will not come when prompted with an on the spot question.   Today I think that’s more from nerves of a new instructor.

I say I normally check the plane and he’s happy for me to go get on with that.

Pre-Start & Radios

‘New Instructor Syndrome’ caused me to mess up a few of my pre-start checks that were second nature, one thing that kept catching me out was waiting for a response, only to turn and get a sense of “That’s great….Get on with it…don’t wait for me.”

Having used the radio’s only once, I was expecting NIS to mean I wouldn’t be getting to use them today.   Any such thought rapidly got shot down:

“Are you ok with the Radio?”

“I’ve done it once last time out.”

“Good, you can get our taxi clearance then…”

The gods of the airwaves are still being kind to me and the request rolled off clearly and fluently – though I’ve gotta say some airplane registrations are easier to roll off the tongue than others.   Golf Sierra Hotel Wiskey Kilo, is not one of them!

We got clearance to taxi to holding point Alpha, my read back was good…and then it was out of the window with any rehearsed radio as air traffic control immediately called:   “Golf Wiskey Kilo, Cancel last taxi instruction, taxi to Holding Point Bravo.”

With a glance to my instructor as if to say “You or me?”,  I hit the mic button and replied….Call back correct….Plane designation in the right place, abbreviation of call sign at appropriate point.    It was one small step for man, but another giant boost in confidence for using the radio.

Taxi and Take-Off

Taxing was another small step better, but arrrgh I’m still riding the brakes!!    I don’t notice I’m doing it, then it’s pointed out to me and I suddenly realise I’m pressing them……still to the casual outside onlooker, it at least looks like I know what I’m sort of doing.

I radioed the tower we were ready for departure and handled the take off clearance.

For my next ‘first’, I was informed I’d be handling the throttle & rudder for take-off.   Perhaps it’s a good thing this instructor hadn’t seen some of my earlier taxing rudder work!

Lined up on the runway I began pushing the throttle in and was informed of my first mistake.   Instead of putting the power in smoothly, in the excitement I just went in one continuous motion to full power (nobody said anything about smooth or incremental , I’m sure it was just “full power”).

We carried on, tearing down the runway, I was allowed to get as much of a feel for the keeping it straight as the runway would allow.   It wasn’t something I’d call pretty, but we kept vaguely straight……..2 or 3 more goes and we should have it looking about right.

The instructor did the actual take off, but my first take off feels like it’s on the horizon now.

The Lesson

So far everything we’d done had been repetition of what I’d done before.

I was handed control at around 1000ft and held the climb until we got to 3000ft.   The sky was very calm, very blue and perfect for learning straight and level flight.

Throughout the lesson my instructor set the plane up into a bad configuration (Wings not level, often pitching slightly downwards, throttle set wrong) and then the controls were handed over to me to get the plane back onto a straight and level by bringing the wings level, re-setting the power to 2200rpm, sorting out the attitude, holding and then trimming the plane.

We did some heading hold work on 330 degrees, and then turned left to follow the A1198 down to Wimpole Hall.   I’d been their the week before, it’s better from 3000ft!

Another turn and we were heading back to the airport.

During the whole lesson my instructor reiterated that lookout, was the most important thing to get drilled into instinct.   The other thing he said was that for FREDA (Fuel, Radio, Engine, Direction, Altitude) checks, to do them not as a set piece one immediately after the other and thus taking say a minute of stopping and doing very little else mentally.   Instead to do one, say Fuel, then carry on flying….then do Radio and carry on flying for a minute or two, then do Engine.   Never stop flying the plane!

Approach

I flew the approach, turning on to the downwind leg of the circuit I was  bit tight on the circuit so we extended the downwind and flew a bit further before turning onto the base leg.    My instructor asked if I’d ever landed before, to which I replied no, so he promptly let me get on with doing the descent and approach / line up for the runway.

I felt my line up was as good as it could ever get, at one stage I was maybe 50ft lower then I’d liked but a bit of power corrected that, we came in heading straight for the centre line.   At around 100ft my instructor took the controls and talked me through the last stages of the landing – before promptly hitting the runway a little hard to an explanation of “This thing doesn’t land like an Airbus.”   🙂    If I’d have done that landing, I’d have been proud of it, so he’ll get no complaints from me.

It did leave me with the sensation that my first landing is not far away, it was tantalisingly close today.

All in all another really enjoyable lesson, winter is approaching which is likely to cause more delays and missed lessons due to bad weather, but all you can do is keep trying.   When you get the weather, particularly like it was for this lesson, flying is the best way to spend your day…..

Wind, Pressure and Coriolis Force

September 11th, 2011 by PHC | Permalink

Lesson cancelled today due to a high cross wind, almost at a right angle to the run way.   Rather than dwell on the fact that I now seem to have complete control of the wind and rain (but cannot tame the sun!!).   Time to look back at the cause of today’s cancellation…… The Wind.

Air Pressure

First thing to remember when looking at a map plotted with measurements of pressure (e.g. 1010mb),  is that you’re actually  looking at a plot of ‘elevation corrected‘ pressures – not the actual measured pressures.   This is because if you didn’t correct all the measurements taken across a large chunk of land, all you’d have a is a map of pressure with respect to elevation.    This will tell you nothing about wind, it would just be telling you that the high point had low pressure and the lower point had a higher pressure…..  Which is obvious because pressure decreases with altitude.

The correction is roughly 1mb per 27ft above mean sea level of the location, though is often rounded to 1mb = 30ft.

If lots of points are taken at the same time across a large area (i.e. a country), and the measurements are elevation corrected to put them all at mean sea level.   Then you’ve effectively got a map of pressures which you can then use to see how steep the pressure gradients are, which will tell you about the wind.

Isobars

With all the pressure measurements elevation corrected and plotted on a map.  Lines can be drawn to connect points of equal sea level pressure.   These lines are isobars.

Lines close together indicate:  A steep gradient in pressure over a short distance.

Lines far apart indicate: A slack pressure gradient.

Pressure Gradients

Air flows down a pressure gradient, from high pressure to low pressure.

The steeper the pressure gradient, the faster the air flows….  The greater the wind!

As the proximity of the isobars dictate the steepness of the pressure gradients:   The closer the isobars are together, the greater the wind will be.

Coriolis Force

Coriolis force is caused by the earths rotation, instead of traveling in a straight line along the pressure gradient line – Coriolis force causes the wind to be deflected and flow in an arc.

The force is strongest at the poles (north/south) and acts at 90 degrees to the Right of the moving air particle in the Northern hemisphere.   While it acts at 90 degrees to the Left in the Southern hemisphere.

Because air will flow from high pressure to low pressure and the Coriolis force can act at a different angle to that flow.   It is feasible for the air flow caused by the pressure gradient and the Coriolis force to cancel each other out.

Wind Measurements

Finally wind is always measured as a Velocity.

This means it must always be expressed as having two components:

  1. Direction
  2. Speed

There’s lots more to wind:   Local Winds, Wind Velocity with altitude, ground obstacles & turbulence etc. etc.   All for another post….

Visual Flight Rules (VFR)

September 5th, 2011 by PHC | Permalink

To fly Visual Flight Rules (VFR), you must be flying in Visual Meteorological Conditions (VMC).

Yet while VFR is typically wrapped up into a quick statement like:  ‘Able to see the ground’.  Visual Meteorological Conditions vary.

Airspace

Airspace is broken up into a number of categories (A to G).

The type of airspace dictates if you’re allowed to fly VFR at all and if so, what visibility you must have both horizontally and vertically.

So for example, VFR flight in Class A airspace is not permitted.

Class C..E airspace:  Requires 5km forward visibility, 1500m horizontal and 1000ft vertically from cloud (below FL100 [~10,000ft subject to air pressure]).

Class F..G airspace:  Below FL100 and Above 3000ft Above Mean Sea Level (amls), Requires 5km forward visibility, 1500m horizontal and 1000ft vertical from clouds.   Below 3000ft amls & 140knots indicated air speed, you need the same forward visibility but be insight of the surface and free of cloud (i.e. no clouds).

* Class B airspace in the UK is only allocated above FL245, outside of the ceiling range of aircraft like Cessna’s so you don’t need to worry about it.

Eight, Five and Three….

The visibility rules are fairly straight forward because in almost all airspace the distances group into sets.   Above FL100 you need Eight kilometres of forward visibility.   At all times you need at least five kilometres forward visibility.  Above three thousand feet you need 1000ft vertical height from cloud, 1500ft horizontal, below it you need to be clear of cloud.

….The exceptions to this are Class A and Class B airspace, you can’t fly in either.   Eight and Five still apply, but if you could fly there you’d need to be clear of cloud.

Radio Contact

An aircraft cannot fly in Class B, C or D airspace during the notified periods of Air Traffic Control operation until the pilot has obtained an air traffic clearance to do so.   While in the airspace the pilot must listen to the appropriate radio frequency and comply with ATC requests wherever able to do so – therefore the plane must have a working radio (and the pilot must hold a license to use it [or be ‘permitted’ to use the radio]).

In Class E, F and G airspace, radio contact with air traffic control is not mandatory outside of Aerodrome Traffic Zones (ATZ’s).

It is worth noting that the pilot is responsible for keeping his/her plane flying legally, so while Air Traffic Control can request you to do something in controlled air space, if this would stop you from flying in VFR/VMC conditions, it is the pilots responsibility to say they cannot comply with the request.

Special VFR

…..The get out for how to fly into an aerodrome that is within a Class A control zone (i.e. London).   And something for another post.

Revisiting Flaps

September 3rd, 2011 by PHC | Permalink

In the previous post I made a correlation between lift and pitch, it’s been bugging me because it was a bit loose and there is a lot more to it, so perhaps an elaboration of the bullet points is in order.

A plane has a number of forces acting upon it.

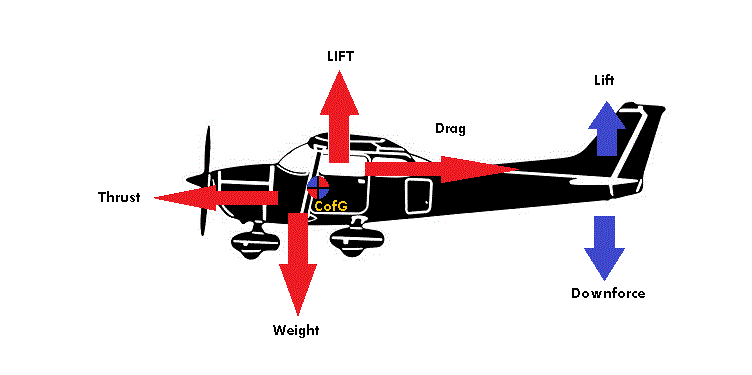
Cue a diagram:

Cessna Centre of Gravity Forces

Aeroplane Forces

The position of the Centre of Gravity is key and any given aeroplane will have defined limits on how far forward or rearward it can be (outside of which the plane is illegal to fly!).

The reason for this is that the position of the Centre of Gravity impacts planes stability in pitch.   This is because the distance between the Centre of Gravity and the planes stabaliser  (seen above creating lift or downforce), defines the leverage the stabaliser has.

If the distance is very long (centre of gravity is very far forward), then the plane will be very stable in pitch.   However, too stable and the pilot will have no control of the plane.

If the distance is very short (centre of gravity very rearwards), then the plane will be unstable – highly manoeuvrable, but in the extreme it will make the plane tail heavy and the pilot will not be able to stop the plane from wanting to pitch nose up.

So using the diagram above, if the downforce generated by the stabliser increases and overcomes weight the plane will start to pitch nose up.   If the stabaliser starts to generate lift, the plane pitches nose down.

There is a couple around the CofG for thrust and drag, if thrust increases considerably this to will make the plane pitch up……but this is due to a secondary effect.  Increasing thrust will impact the lift/downforce forces – and they will dictate pitch.   Thrust/Drag alone do not make an object change its pitch, you can think of a plane as a car at this point…..but add wings to a car and it becomes a plane because now you have lift & downforce which will either push the thing into the ground or make it take off.

Pitch of an airplane is dictated by its centre of gravity and the forces acting forward or aft in a vertical direction around that lever.

Balance Lever

Balance Lever

If the net forces acting down on the right of the lever is greater than the net forces acting down on the left of the lever……the plane will be pitched nose up.   If it’s reversed, the plane will pitch nose down.

The first diagram shows that if extending flaps to 10 degrees just increased lift, the plane would pitch nose down – as it would pivot around the centre of gravity.  The fact the plane (high wing designs) doesn’t do this, tells us that the extended flap is also having an effect on the forces generated by the stabaliser, which is outweighing lift/weight pivot.

So what’s going on?

The extended flap changes the shape of the wing, this changes the airflow off the wings trailing edge.  On a high wing aeroplane design like on a Cessna, this  increases the downwash striking the stabaliser.   In turn this means the stabaliser generates more downforce.

We’re now back at the balance lever diagram, the increased downforce outweighs the lift/weight couple and causes the plane to pitch nose up.

Pitching nose up causes speed to reduce, reducing lift, causing the plane to pitch down and hey presto the plane is oscillating – until it balances itself out.

Most of the above has explained high wing designs, for low wing designs like the Piper Cherokee the principles are the same but the plane will pitch nose down.   This is because in low wing designs the main wing and the stabaliser are roughly level, so now changing the shape by extending flaps causes less downwash to strike the stabaliser.   The lift/weight couple has more effect because the stabalisers ability to produce lift is reduced.